Installing Under-Cabinet Lighting Like a Pro
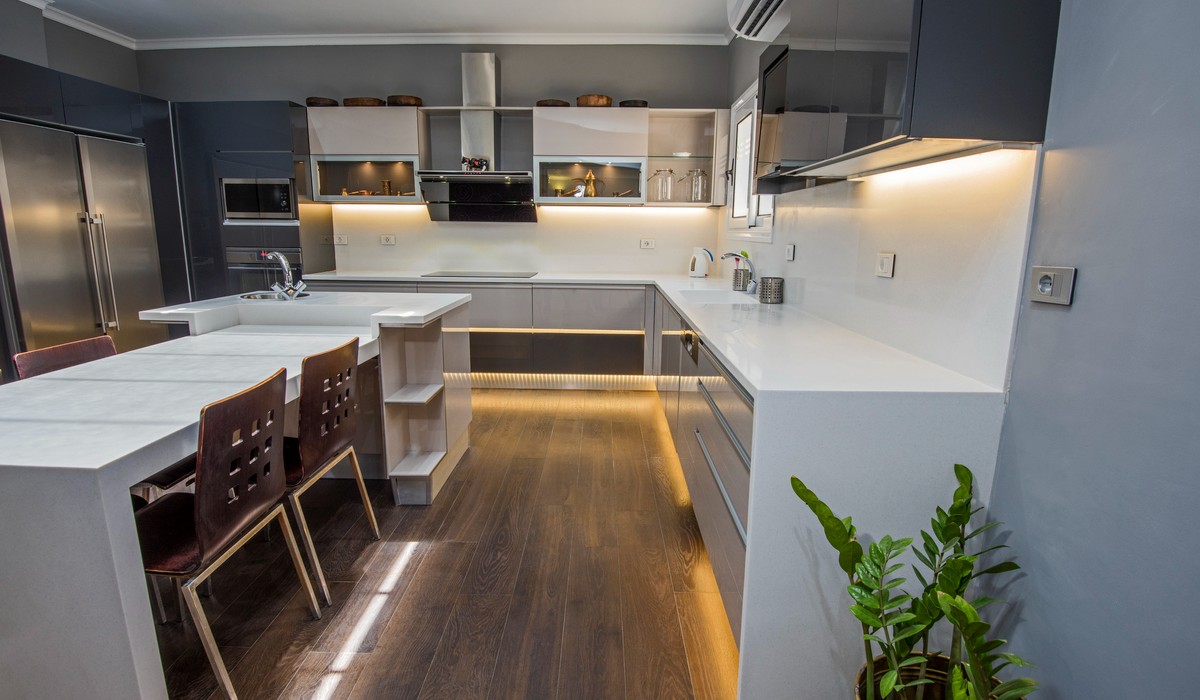
If you’re looking for a way to make your kitchen functional and stylish, installing under-cabinet lighting is a great way to illuminate hard-to-reach spaces and make your kitchen’s aesthetic sophisticated and sleek. Under-cabinet lighting is an excellent addition to any kitchen, providing additional illumination on countertops or other surfaces where overhead lights cannot reach. We’ll detail all you need to know to install your own under-cabinet lighting, including the different types of lighting available and some tips and tricks for a successful installation.
Types of Under Cabinet Lighting
When choosing under cabinet lighting, you need to decide on which type of lighting to install. Fluorescent lamps are available in LED strips, halogen bulbs, and xenon bulbs, and each has unique characteristics and energy efficiency levels. The type you should pick depends on how much light you need and how much energy you are willing to use.
Preparing To Install
Before beginning any installation project, it is important to consider any safety concerns and ensure you have all the necessary tools and materials. For this project in particular, you’ll need:
- A power drill
- Screws
- Wire cutters
- Electrical tape
- Wire connectors
- A transformer
- Two-wire or three-wire cables
- The desired under-cabinet lighting fixtures
Step-by-Step Instructions
- Mark and drill install locations
Before installing your fixtures, determine where they should be placed by measuring the distance between them.
Mark their locations on the underside of your cabinets.
Once marked, use a power drill to make holes for your screws that are large enough for the fixture’s mounting brackets. - Connect wires and attach fixtures
Once your holes have been drilled, attach your fixtures using screws and connect the wires from each together according to the manufacturer’s instructions.
Securely connect each wire end with electrical tape or wire connectors so that no bare wire is exposed once installed. - Install the transformer and connect to power
To power your under cabinet lighting system, install a transformer near an outlet and attach it with screws or zip ties as per the manufacturer’s instructions.
Once your transformer is installed, connect the two-wire or three-wire cables from the fixture locations to the transformer input terminal to supply power to the fixtures.
Most transformers will require two wires for connection (commonly referred to as line voltage). Some ultra-low voltage systems may require three wires for connection (commonly called low voltage).
Finishing Touches
Additional steps may be necessary to complete installation once you’ve connected all your fixtures to a power source. For example, adding a wireless module or dimmer switch can provide additional control over under-cabinet lighting if desired; however, this will require additional purchase and an extra step in wiring installation (be sure to follow the manufacturers’ instructions). After connecting all of the wires, check for proper connections by testing for power at both ends with a voltage meter before continuing with other finishing touches, such as final clean-up and safety checks.
Final Thoughts
Installing under-cabinet lighting can transform your kitchen, improving visibility, creating a more inviting atmosphere, and adding convenience and safety while cooking — all without breaking the bank! With proper preparation and basic tools, anyone can install under-cabinet lighting in their home. With the help of our DIY guide, you can easily achieve your perfect kitchen lighting setup. Happy installing!