logo
logo
  • Home
  • Projects
  • Exterior Reno
  • Interior Reno
  • Lawn & Garden
  • Tool Reviews
  • The DIY Squad
  • Interior Renovations

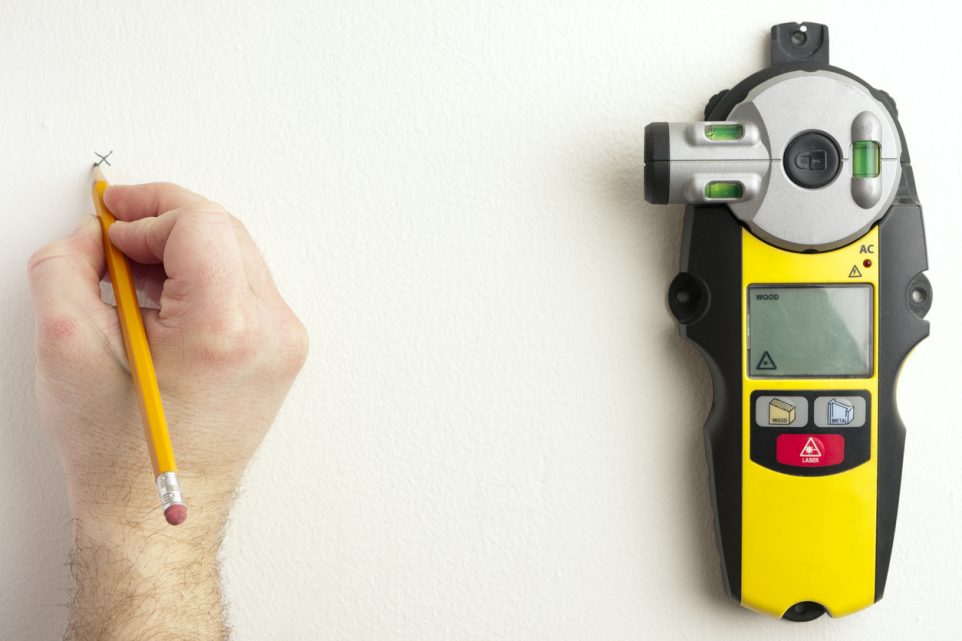
How To Use a Stud Finder: Pro Tips, Tricks, and Resources

Mike Dover
Written By Mike Dover
Original Publish Date: Jun 16, 2024, 06:30 AM
Last updated: Jun 19, 2024, 06:30 AM
Disclosure ↓
How to Use a Stud Finder
View all Contents
  • Why a Stud Finder is Your DIY Best Friend
  • When You Really Need to Use a Stud Finder
  • Getting Started: Setting Up Your Stud Finder
  • Finding Studs: A Step-by-Step Guide
  • Mastering the Technique: Tips for Perfect Results
  • Resources for Further Assistance

If you’ve ever faced the challenge of hanging a heavy picture, setting up shelves, or even mounting a TV, you know how important it is to get things right the first time. No one wants to deal with the aftermath of a poorly hung object—think crooked photos, collapsed shelves, or, worse, a hole-ridden wall. That’s where a stud finder comes in handy. Let me walk you through everything you need to know about using this clever device to make your DIY projects a breeze.

Why a Stud Finder is Your DIY Best Friend

A stud finder is a must-have in your tool arsenal, especially if you’re planning to hang anything heavier than a simple picture frame. It’s all about stability. Drywall alone won’t support much weight, but the studs—those sturdy wooden beams behind your walls—are the key to securely anchoring heavy objects.

When You Really Need to Use a Stud Finder

Think about hanging large, heavy frames, mounting a television, or setting up shelving systems that need to bear considerable weight. In all these cases, just hammering a nail into the drywall won’t cut it. You’ll need the solid support of a stud to prevent your valuables from taking a tumble. Also, for safety reasons, it’s crucial when you’re planning to install heavy cabinetry or large mirrors. The last thing anyone wants is a serious accident from something falling off the wall.

Getting Started: Setting Up Your Stud Finder

First things first, make sure your stud finder is ready to go. Check the batteries—nothing’s more frustrating than getting halfway through a job and having your tool die. Most stud finders need to be calibrated, so follow the manufacturer’s instructions to get it set up. This usually means holding it against the wall away from any studs to reset its baseline reading.


Finding Studs: A Step-by-Step Guide

Here’s how you can locate studs like a pro:

  1. Start on the Right Foot: Begin your search at a corner of the room, or near a door frame, as there’s often a stud located here.
  2. Slow and Steady: Move the stud finder horizontally across the wall. Keep the tool flat against the wall to maintain the best accuracy. Move it slowly; rushing can lead to missing a stud or getting an inaccurate reading.
  3. Indicator Alerts: Keep an eye (or an ear) out for beeps or lights (depending on your model) that signal when you’ve passed over a stud. Some advanced models might even display the edges of the stud on a small screen.
  4. Mark the Spot: Once you detect a stud, mark the edges with a pencil or some painter’s tape. This helps to pinpoint exactly where to drive that nail or screw when you’re ready to hang or mount something.

Mastering the Technique: Tips for Perfect Results

To really nail this process (pun intended), here are a few extra tips:

  • Double Check: Always scan the area more than once to confirm the stud’s location. This is especially important for critical projects like installing TVs or shelves.
  • Predict the Next Move: Once you find one stud, you can usually measure 16 or 24 inches to either side to find the next one, as that’s how far apart studs are typically spaced.
  • Use Your Surroundings: Electrical outlets and light switches are usually attached to one side of a stud. You can use these as clues to find nearby studs.

Resources for Further Assistance

If you’re new to using a stud finder or need additional guidance, there are several resources available to help you.

Online resources like home improvement websites and YouTube channels offer a wealth of information. You’ll find detailed video tutorials that walk you through using a stud finder effectively. Don’t forget the manual that came with your specific stud finder–it’s a treasure trove of detailed instructions and troubleshooting tips.

And if, after exploring these resources, you’re still feeling unsure, there’s always the option to consult a professional contractor or handyman. They can guide you through the process step-by-step and ensure you locate those studs with confidence.

Contributors

Mike Dover
Mike Dover
Back to top
logo

©2025. All Rights Reserved

  • About Us
  • FAQ
  • Contact Us
  • Privacy
  • Terms
Contact

[email protected]

We independently research, test, review, and recommend the best products. If you buy something through our links, we may earn a commission at no cost to you. Click here to learn more about our process.