How To Paint a Ceiling: Everything You Need to Get Started

When it comes to giving a room a fresh look, painting the ceiling is often the most dreaded part. The prospect can cause even seasoned DIYers to cringe at the thought of neck strains and endless hours of brushing and rolling overhead. But with some tips and techniques, you can make the process both efficient and rewarding.
When it comes to painting, there are two methods I love: the traditional brush and roller approach and the more modern and perhaps intimidating paint sprayer. I’ve personally tried both on various projects, and in this article, I’ll share both, including tips for selecting the right tools, mastering the techniques, and getting a smooth, professional finish.

Here’s What You’ll Need
|
|
|
|
|
|
|
|
|
Preparing the Area

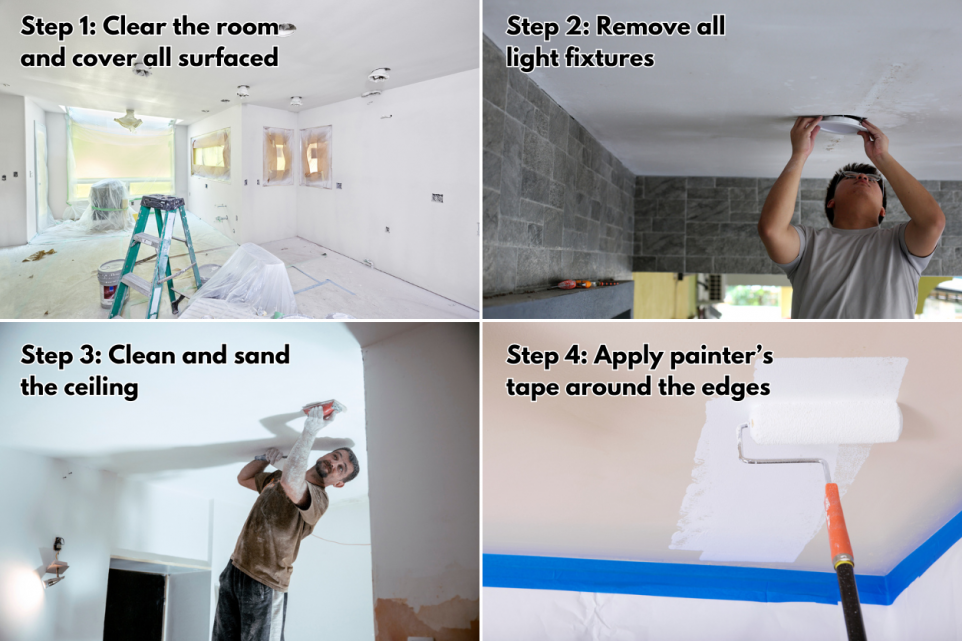
| Step 1: Clear the room. Start by removing as much furniture as possible to give yourself ample space to work. For furniture that’s too heavy to move, cover it well with drop sheets. |
| Step 2: Remove any fixtures. Turn off the power at your circuit breaker before handling any electrical fixtures like ceiling lights. Remove these fixtures and cover the wiring with a plastic bag to protect it from dust and paint. |
| Step 3: Clean and sand. Use a broom to sweep away cobwebs and dust. Wash the ceiling with sugar soap to remove stains and any leftover debris. If your ceiling isn’t textured, lightly sand it with 100-grit sandpaper to create a smooth surface that will help the paint adhere better. Wipe it down afterward with a damp sponge to remove sanding dust. |
| Step 4: Tape and cover. Apply painter’s tape around cornices, edges, and any fixtures. This will help you achieve clean lines without the hassle. Cover the floor and any remaining furniture with drop sheets, securing them with tape to prevent slippage. |
Painting the Ceiling: Traditional Method
Apply a coat of primer, especially if you’re dealing with stains or if the ceiling has never been painted before. Let the primer dry completely as per the manufacturer’s instructions.
Start painting from the corner of the room. Attach the roller to the extension pole and dip it into the paint tray. Roll the paint in sections about 2×2 meters. Work quickly from one section to the next to ensure the edges do not dry out, which can cause visible lines in the finish. Use the paintbrush to cut in at the corners and along the edges.
If one coat isn’t enough, let the first coat dry thoroughly before applying the second. This ensures depth of color and a uniform finish.
Using a Paint Sprayer: Untraditional Method
Now don’t get me wrong; I’ve always loved the brush and roller method for paint jobs. But painting this way can be a literal pain in the neck!
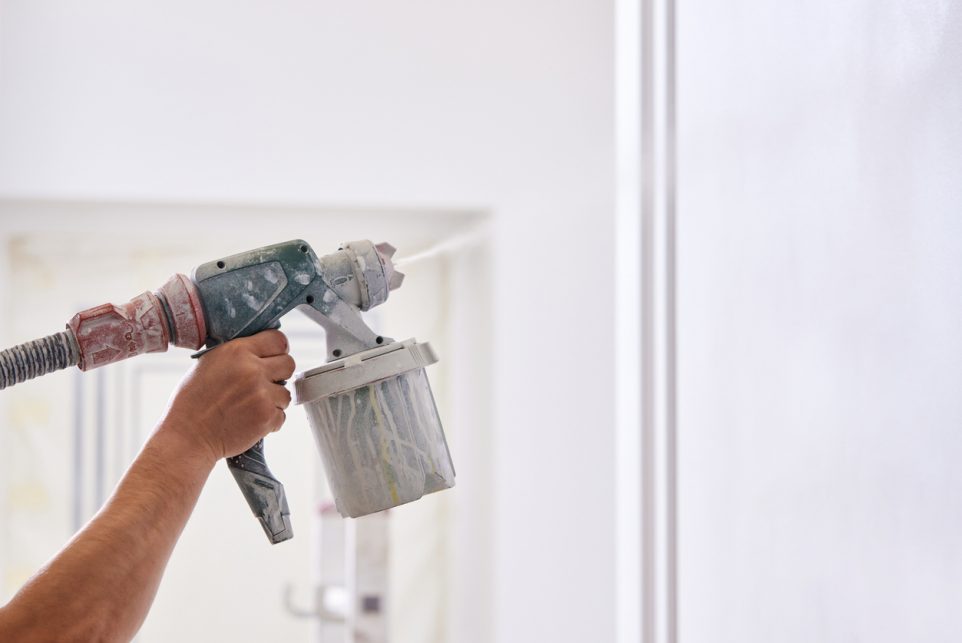
What if I told you there’s a better way? For the last two times that I’ve painted my house, I used a paint sprayer, and I can’t tell you how incredible this method is for saving time and energy. If it gets the job done in less than half the time, wouldn’t you at least consider trying it?
You’re probably thinking, “Well, Mike, I don’t even own a paint sprayer. What do I do?” I don’t either. You can rent a paint sprayer from most large hardware stores like Home Depot or even from local paint shops, and it’ll cost you anywhere between $40 and $100 per day. An airless sprayer is what you’re looking for—it’s user-friendly and incredibly efficient. When I first tried one out, I was a bit intimidated, but trust me, once you get the settings dialed in, it’s surprisingly straightforward.

Setting It Up
There are a couple of features you’ll need to understand before using a paint sprayer: the power switch and the PSI control, which adjusts the pressure. I usually start with a mid-range pressure setting, as it seems to work best for a variety of paints and provides a nice, even coat without too much splatter.
The primer feature loads the paint into the system. Flip the switch to prime the machine until the paint begins cycling through, and then switch to paint mode. If the paint runs out mid-job, just refill, re-prime, and continue.
Now, before you begin, test the spray pattern on a piece of scrap material. You’re aiming for a consistent output with no gaps in the spray pattern. If you notice inconsistencies, adjust the pressure until it evens out. Now you’re all set to paint your ceiling!
Once you start spraying, maintain a consistent distance from the ceiling—about 12 inches works well—and keep the sprayer perpendicular to the surface. Move in smooth, overlapping strokes to avoid drips. Always keep the sprayer moving to prevent the paint from pooling in one area.
A quick tip: Align your spray pattern so it overlaps slightly with the previous pass. This technique helps cover every inch of the ceiling effectively, ensuring a uniform application.
Advanced Tips for Painting Ceilings
Textured ceilings require special attention due to their uneven surface. If you have popcorn or a stippled ceiling, sanding is a no-go. Unlike flat ceilings, sanding textured ceilings can damage the texture or, in older installations, release harmful particles like asbestos.
To tackle textured surfaces, use a thick nap roller designed to reach into the nooks and crannies. Extension poles are your friend for both rollers and sprayers, allowing you to cover large areas without constantly repositioning the ladder.
Apply the paint slowly and carefully, ensuring full coverage without saturating the texture. Over-saturation can cause peeling or flaking. To reach the entire ceiling safely, use a sturdy extension ladder or consider renting scaffolding. Good lighting is also crucial for even application and spotting missed areas or drips before the paint dries.
Tips for a Flawless Finish
| Avoid lap marks: Work in small sections and always maintain a wet edge. This technique involves overlapping your last stroke with the new stroke before the paint can dry. |
| Thin your paint: If using a sprayer, consider thinning your paint slightly to achieve a finer mist and smoother coverage. |
| Consistent direction: When applying the second coat, paint in the opposite direction to the first coat. This cross-layering helps cover any thin spots and evens out the finish. |
| Drips and Runs: If you notice drips or runs, roll them out immediately or use a clean brush to smooth them out before the paint dries. |
| Uneven Coverage: If after the first coat, the coverage looks uneven, a second coat is usually necessary. Let the first coat dry thoroughly based on the manufacturer’s recommended time before applying the second coat. |
| Paint Buildup on Tape: When removing painter’s tape, do it at an angle and while the paint is still a bit tacky to prevent peeling off any dried paint with the tape. |
Cleaning and Maintenance After Painting
After successfully painting your ceiling, proper cleaning and maintenance of your tools are essential to keep them in good condition for future projects.
Wash the rollers and brushes thoroughly with soapy water. If you used oil-based paints, opt for paint thinner instead. Rinse everything well and allow them to dry completely before storing.
For paint sprayers, refer to the manufacturer’s instructions for proper cleaning. This typically involves flushing the system with a cleaning solution to remove any leftover paint.
And don’t forget about leftover paint! Seal any leftover paint cans tightly and store them in a cool, dry place. Labeling the cans with the date and the room where the paint was used will save you time and frustration during future touch-up jobs.